Please contact us prior to following the instructions below.
Some details in the steps below might change slightly between ADFS 2.0 and ADFS 3.0 (e.g. the screenshots have been taken from version 3.0) but the main configuration process remains essentially the same.
Adding your Asset Bank as Relying Party
- Log into the ADFS server and open the management console.
- in the console tree, right-click the Relying Party Trusts folder, and then click Add Relying Party Trust to start the Add Relying Party Trust Wizard.
- Enter your Asset Bank metadata URL which will be something like
https://my.assetbank.domain/Shibboleth.sso/Metadata
Where my.assetbank.domain is the URL of your Asset Bank:
- Hit next and click OK to acknowledge the message about part of the metadata being skipped: this will not affect the integration with Asset Bank.

- Enter your preferred display name for this relying party configuration.

- On the multi-factor authentication step select "I do not want to configure multi-factor authentication [...]" and click next.

- On the issuance authorization rules step select "Permit all users to access this relying party" and click next.

- The configuration has been completed, you will be able to review the details before finalising the process.
-
Optional step: Configure Single Logout Support
9.1 Go to ADFS manager > Trust Relationships > Relying Party Trusts > properties
9.2 Under the Endpoints tab, click Add
9.3 Configure the settings:
Endpoint type: SAML Logout
Binding: POST
URL: https://myadfsserver.domain.net/adfs/ls/?wa=wsignout1.0 - Select Endpoints and look under Metadata for the URL beside the Federation Metadata type. Copy the URL (or grab the metadata file if the URL is not publicly accessible) and send it to the Customer Service team.
Adding claims for your Asset Bank Relying Party
- Right-click on the relying party trust and select Edit Claim Rules….
- On the Issuance Transform Rules tab select Add Rules….
- Select Send LDAP Attribute as Claims as the claim rule template to use.
- Give the claim a name such as LDAP Attributes.
- Set the Attribute Store to Active Directory and add the following mappings:
LDAP Attribute Outgoing Claim Type E-Mail Addresses E-Mail Address Given-Name Given Name Surname Surname Token-Groups - Qualified by Domain Name Group 
- Select Finish.
- Select Add Rule….
- Select Transform an Incoming Claim as the claim rule template to use.
- Give it a name such as Name ID.
- Choose the Incoming claim type based on what it is used in your organisation as unique user id, usually E-Mail Address or UPN.
Choose Name ID as Outgoing claim type, and Unspecified as Outgoing name ID format.
General ADFS Setup
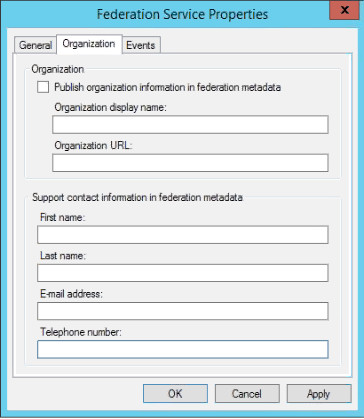
When using "Organization" or "Support contact information" for your federation service please make sure not to leave any empty field as this will produce a self-contained xml tag in the metadata file which will not validate in Asset Bank service provider (Shibboleth).
1. Right-click Service and choose Edit Federation Service Properties...
2. Under the "Organization" tab make sure that:
- Organization details are filled in when "Publish organization information [...]" has been enabled
- Contact information details are all filled in when at least one has been used
Comments
0 comments
Article is closed for comments.